
17 december 2025
Page in English only
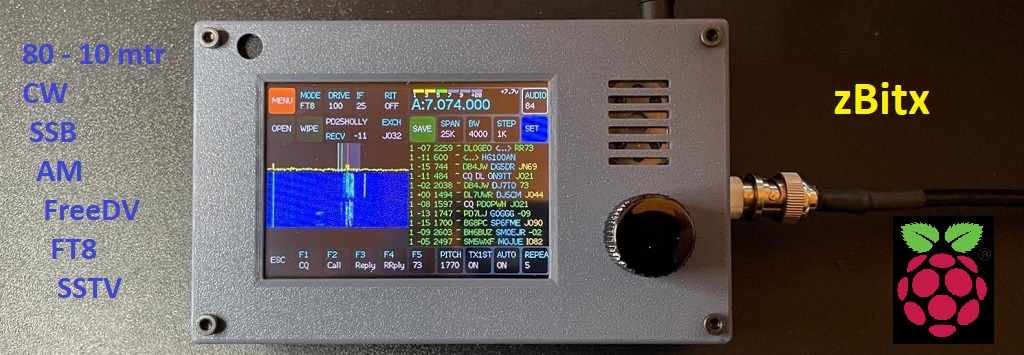
Through a member of our Veron/VRZA IJsselmond group, I was still able to acquire a zBitx. This transceiver, supplied by HF SIGNALS, is based on Raspberry Pi components. It is fully SDR and can be used standalone as well as in a desktop or in a web environment. The transceiver was sold and shipped early 2025 but became obsolte in the mean time in favour of new versions, the sBitx. This version though, the zBitx, was the first of its kind from HF SIGNALS and announced as: “The 5 watts, all bands, all mode SDR in your pocket for $169.“
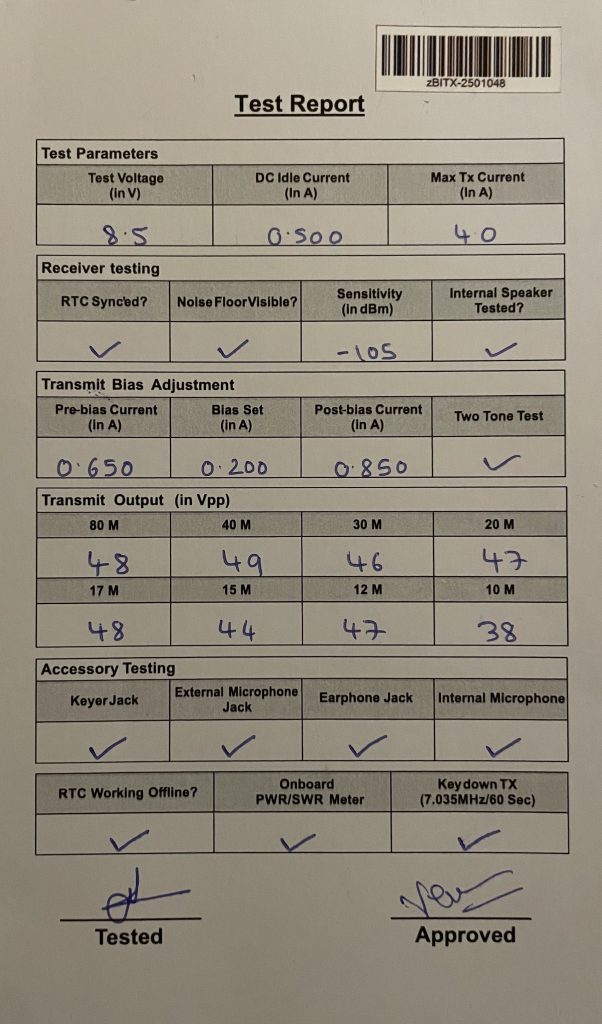
First things first. The maximum supply voltage for the zBitx is 9 volts. So, let’s use the lab power supply and limit the voltage to 8 volts and the current to 3 amps. There’s no on/off switch, so the device booted immediately and displayed the message “zBitx firmware v1.06 Waiting for the zBitx to boot…” on the screen. I downloaded the manual beforehand and started reading on page 7 because FT8 wasn’t showing any decoded stations. What about clock synchronization?
It was then that I realized what was in the box. Besides a circuit board with radio components, the box contained a Raspberry Pi Zero 2 W and a Raspberry Pi Pico! So i’m back to my old love. (see blogs)
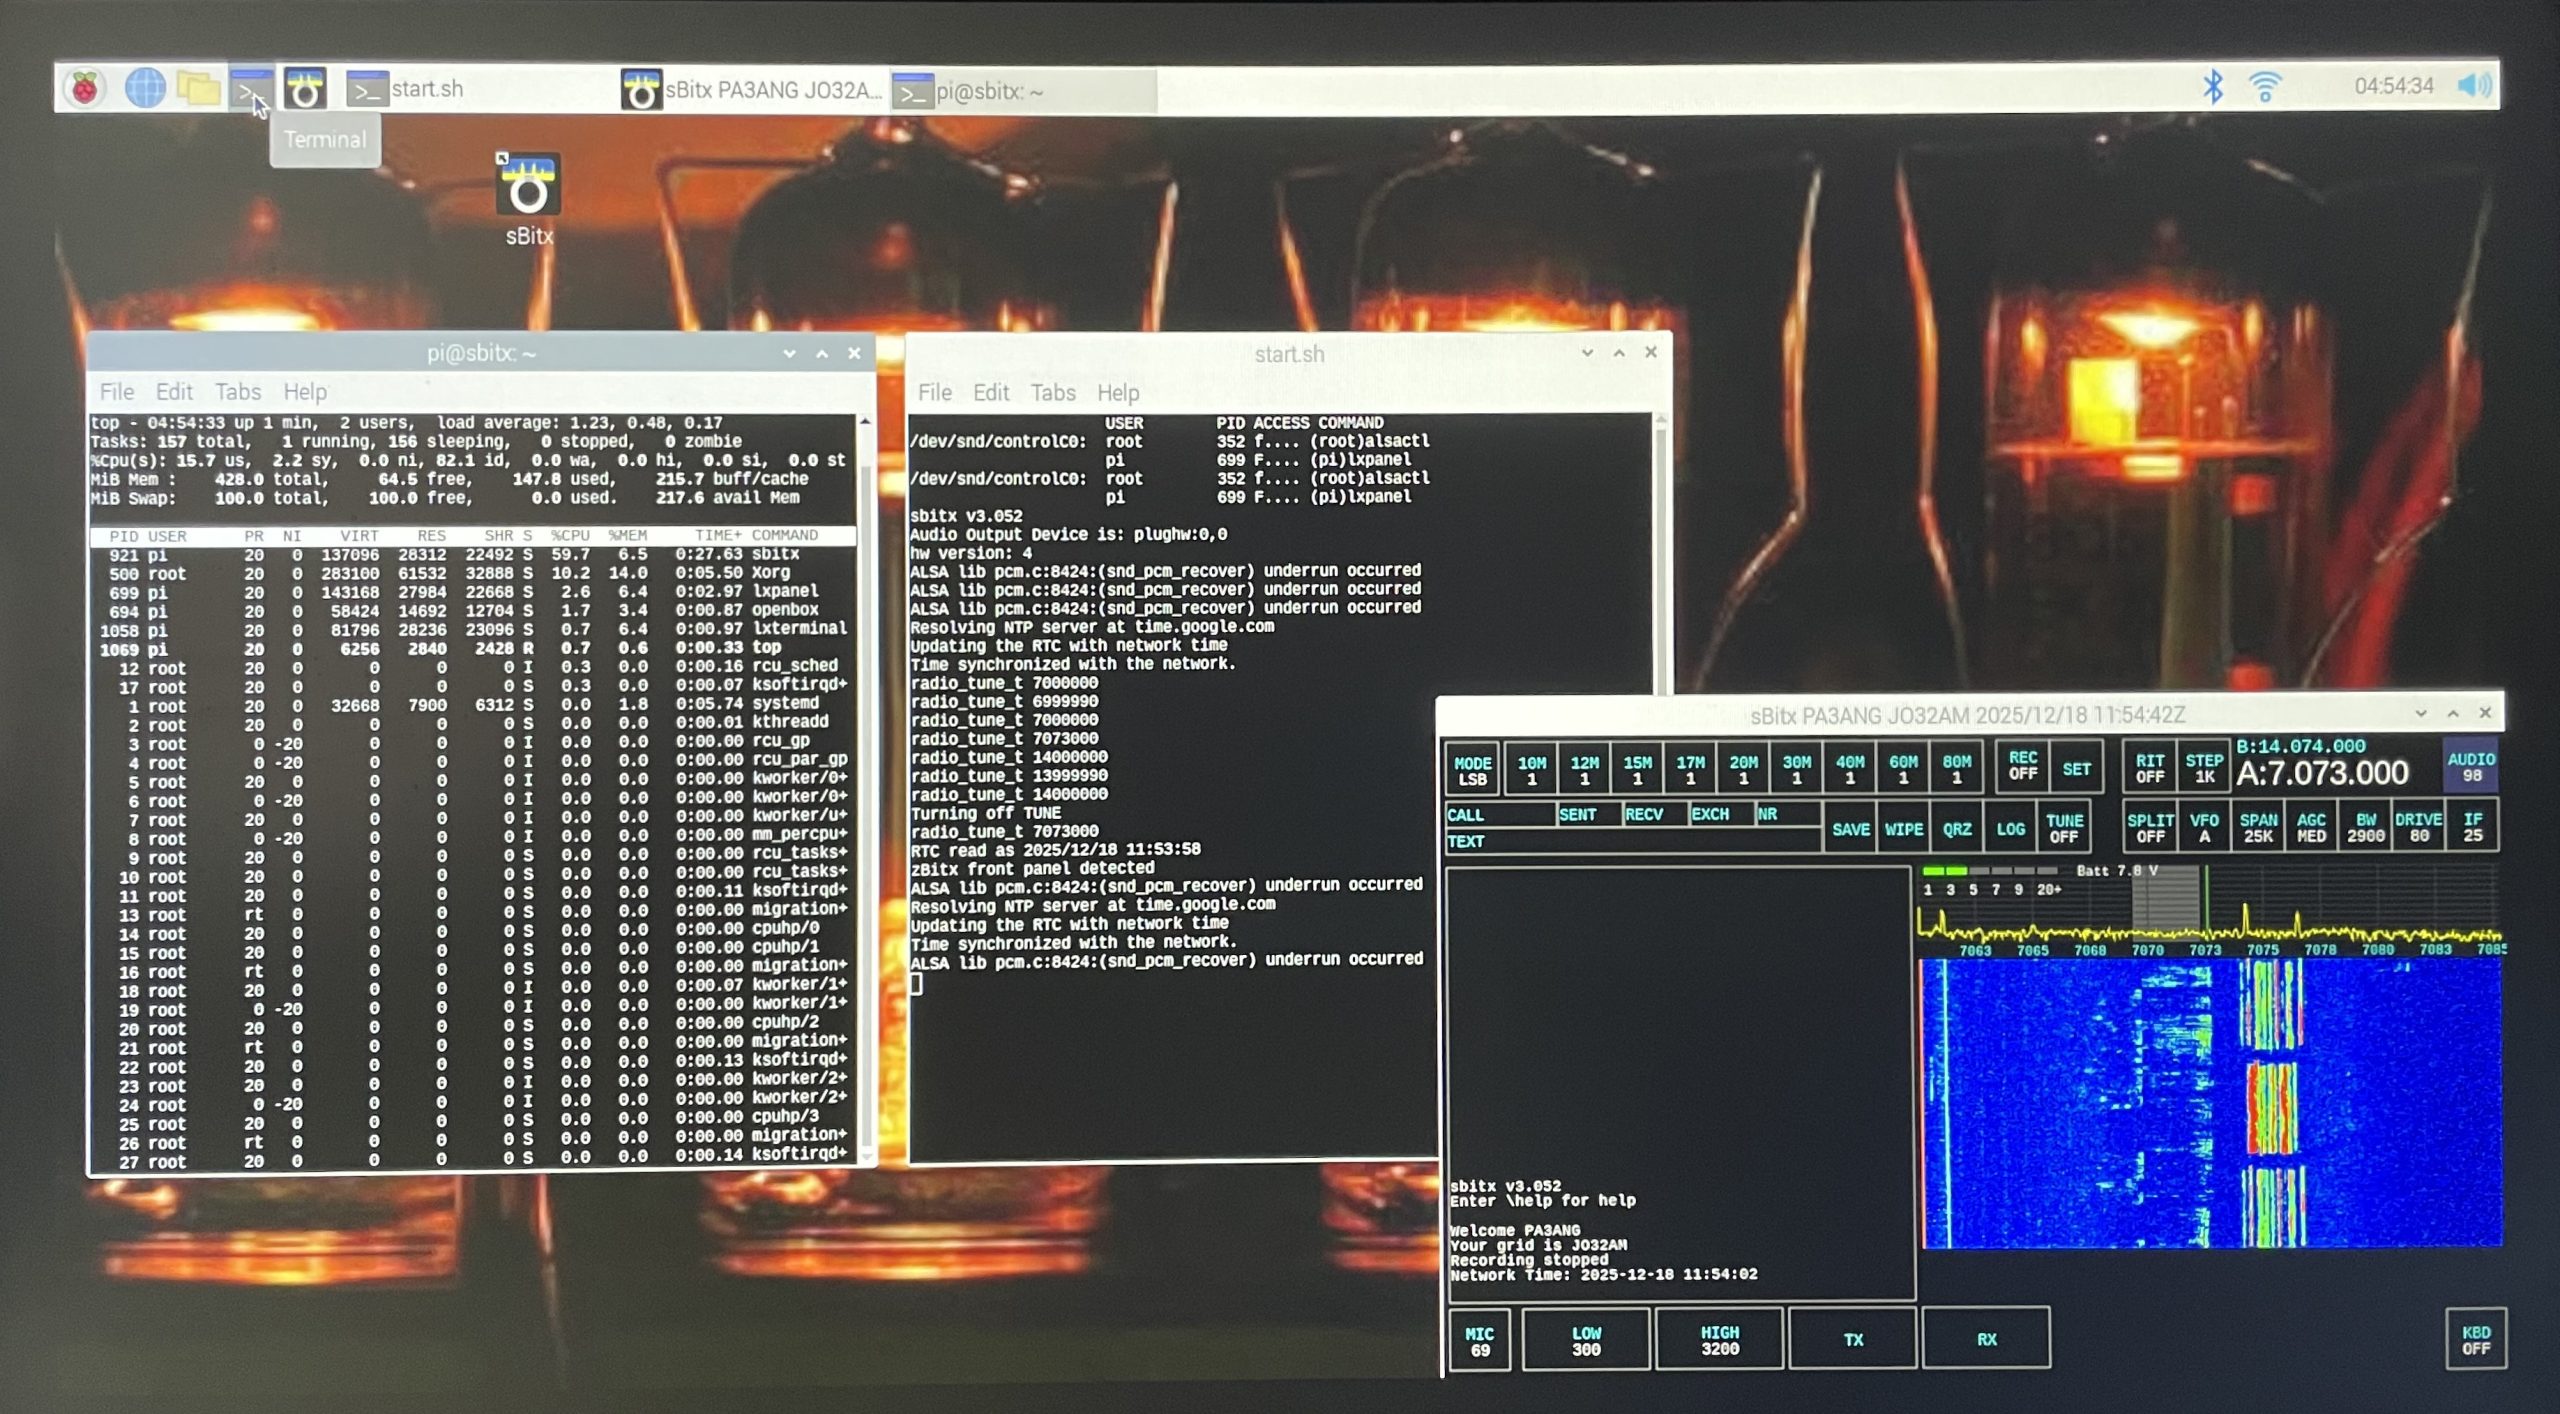
To get the correct time, I had to connect a monitor via the HDMI port, a mouse, and a keyboard. This gave me then a complete RPi desktop environment. I noticed that the localization, etc., was still set to India. So I changed that and entered my home Wi-Fi information. While the clock did synchronize, I explored a bit the software available and processes running on the RPi Zero. In fact, what’s on the SD card is a complete image of an operational system with, besides ham radio-related software, programming software like Arduino IDE, Thonny and Scratch, but also LibreOffice, games, the usual RPi accessories, and system utilities. 🙂 🙁 The program which is really used and starting automatically is sBitx!
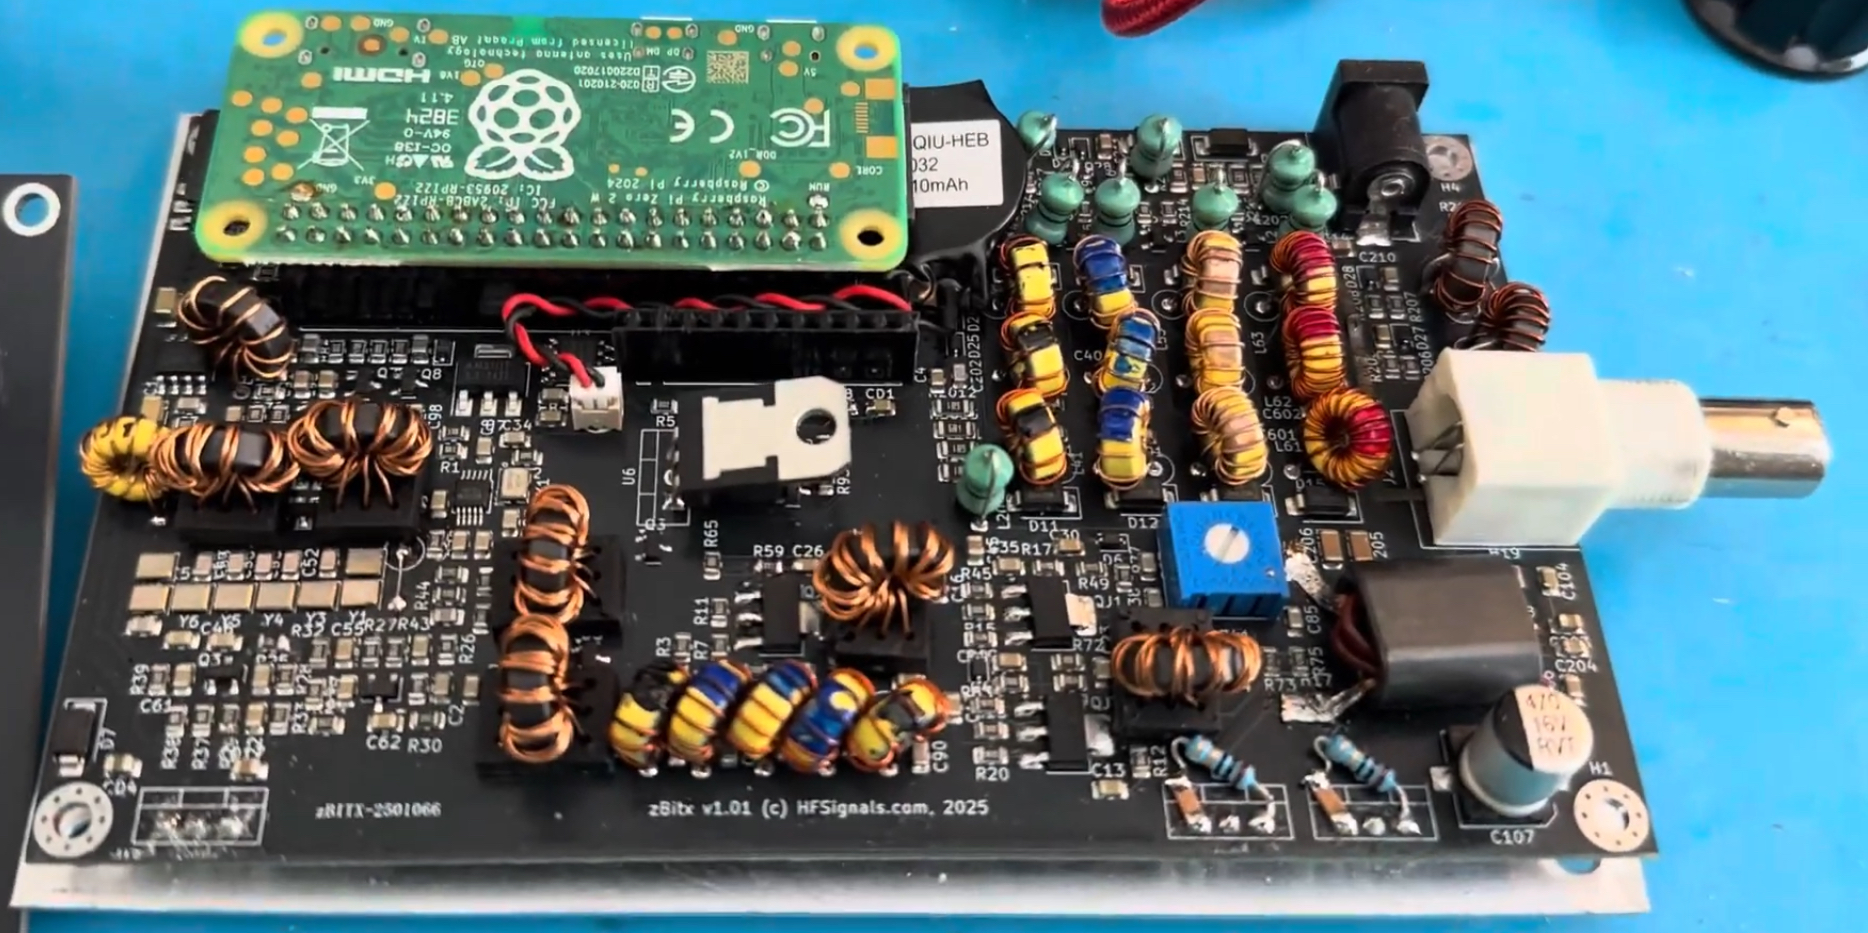
I didn’t disassemble my own zBitx 🙂 because I don’t want to damage it. The RPi-Zero is connected to the 40p connector. The Pico with the TFT display is on a separate board above this radio pcb. So the zBitx essentially is stacked. It’s built on an aluminum plate (used also for heat dissipation), and the enclosure is 3D-printed from plastic. More info on this sBitx.net page. If you want to see a teardown go here.
Anyway, the next question was whether I had the latest software and firmware. I’d seen and heard from others that CW could be a problem due to timing and processor speed. So I followed the instructions, but running ./update as instructed failed. So what now? Help from chatGPT and my own knowledge of git (the program used to synchronize and update GitHub software) provided a solution, and after running the necessary recovery commands, I was able to retrieve and compile the latest version of GitHub. However, it turned out that the version already on the RPi Zero’s SD card was the latest version: v3.052.
Updating the Pico’s firmware was simpler, going from version 1.06 to 1.07d. And while this new firmware should be a significant improvement for CW use, it unfortunately still has problems. Sometimes a dot or dash is missed, and a macro is abruptly terminated. But the biggest problem is undoubtedly the software’s response, and therefore the transmitter’s behavior, to the paddle movements. Because this is a matter of milliseconds, it inevitably goes wrong here. You’re signaling with a cramp, trying not to make mistakes you don’t cause yourself. See Note 1 below, as new software does improve CW.
This is actually quite a shame, because it significantly reduces the radio’s usability and reminds me of the problems I also had with the FLEX-1500 SDR radio, where CW also wasn’t working properly. It’s always better not to handle CW generation with software. (see blog about FLEX-1500)
I tried SSB, but wasn’t particularly impressed. The modulation was mostly muffled (I tried several microphones). Strong modulation, like whistling, made the signal very broad and didn’t really meet current technical standards. I’m not really concerned about this, as in my humble opinion, phone and QRP don’t mix well.
Does this leaves FT8 as the better alternative? After the clock was synchronized, the stations were decoded correctly, and the first connection was established quickly. Once the connection was confirmed, it was also properly logged. So we have good luck with the zBitx here.
The desktop is a welcome addition to the controls and the TFT screen. You can fully control the radio via mouse, keyboard, and monitor. The waterfall is significantly sharper, and the entire radio becomes more usable. There are also a few extra features, such as adjusting the bandwidth filter lower and upper limits.
The web connection works smoothly. Calling http://sbitx.local opens the website directly. The graphical user interface resembles the TFT display on the radio itself. The waterfall display has a low resolution and pauses briefly every second. In my opinion, the Raspberry Pi Zero is far too small to handle all the processes simultaneously. The same goes for the web connection sound. It’s rather unstable and unpleasant to use. But as a PoC, it’s very good to have it available now.
Note: the sBitx V3 is using a RPi4 which is much more powerfull.
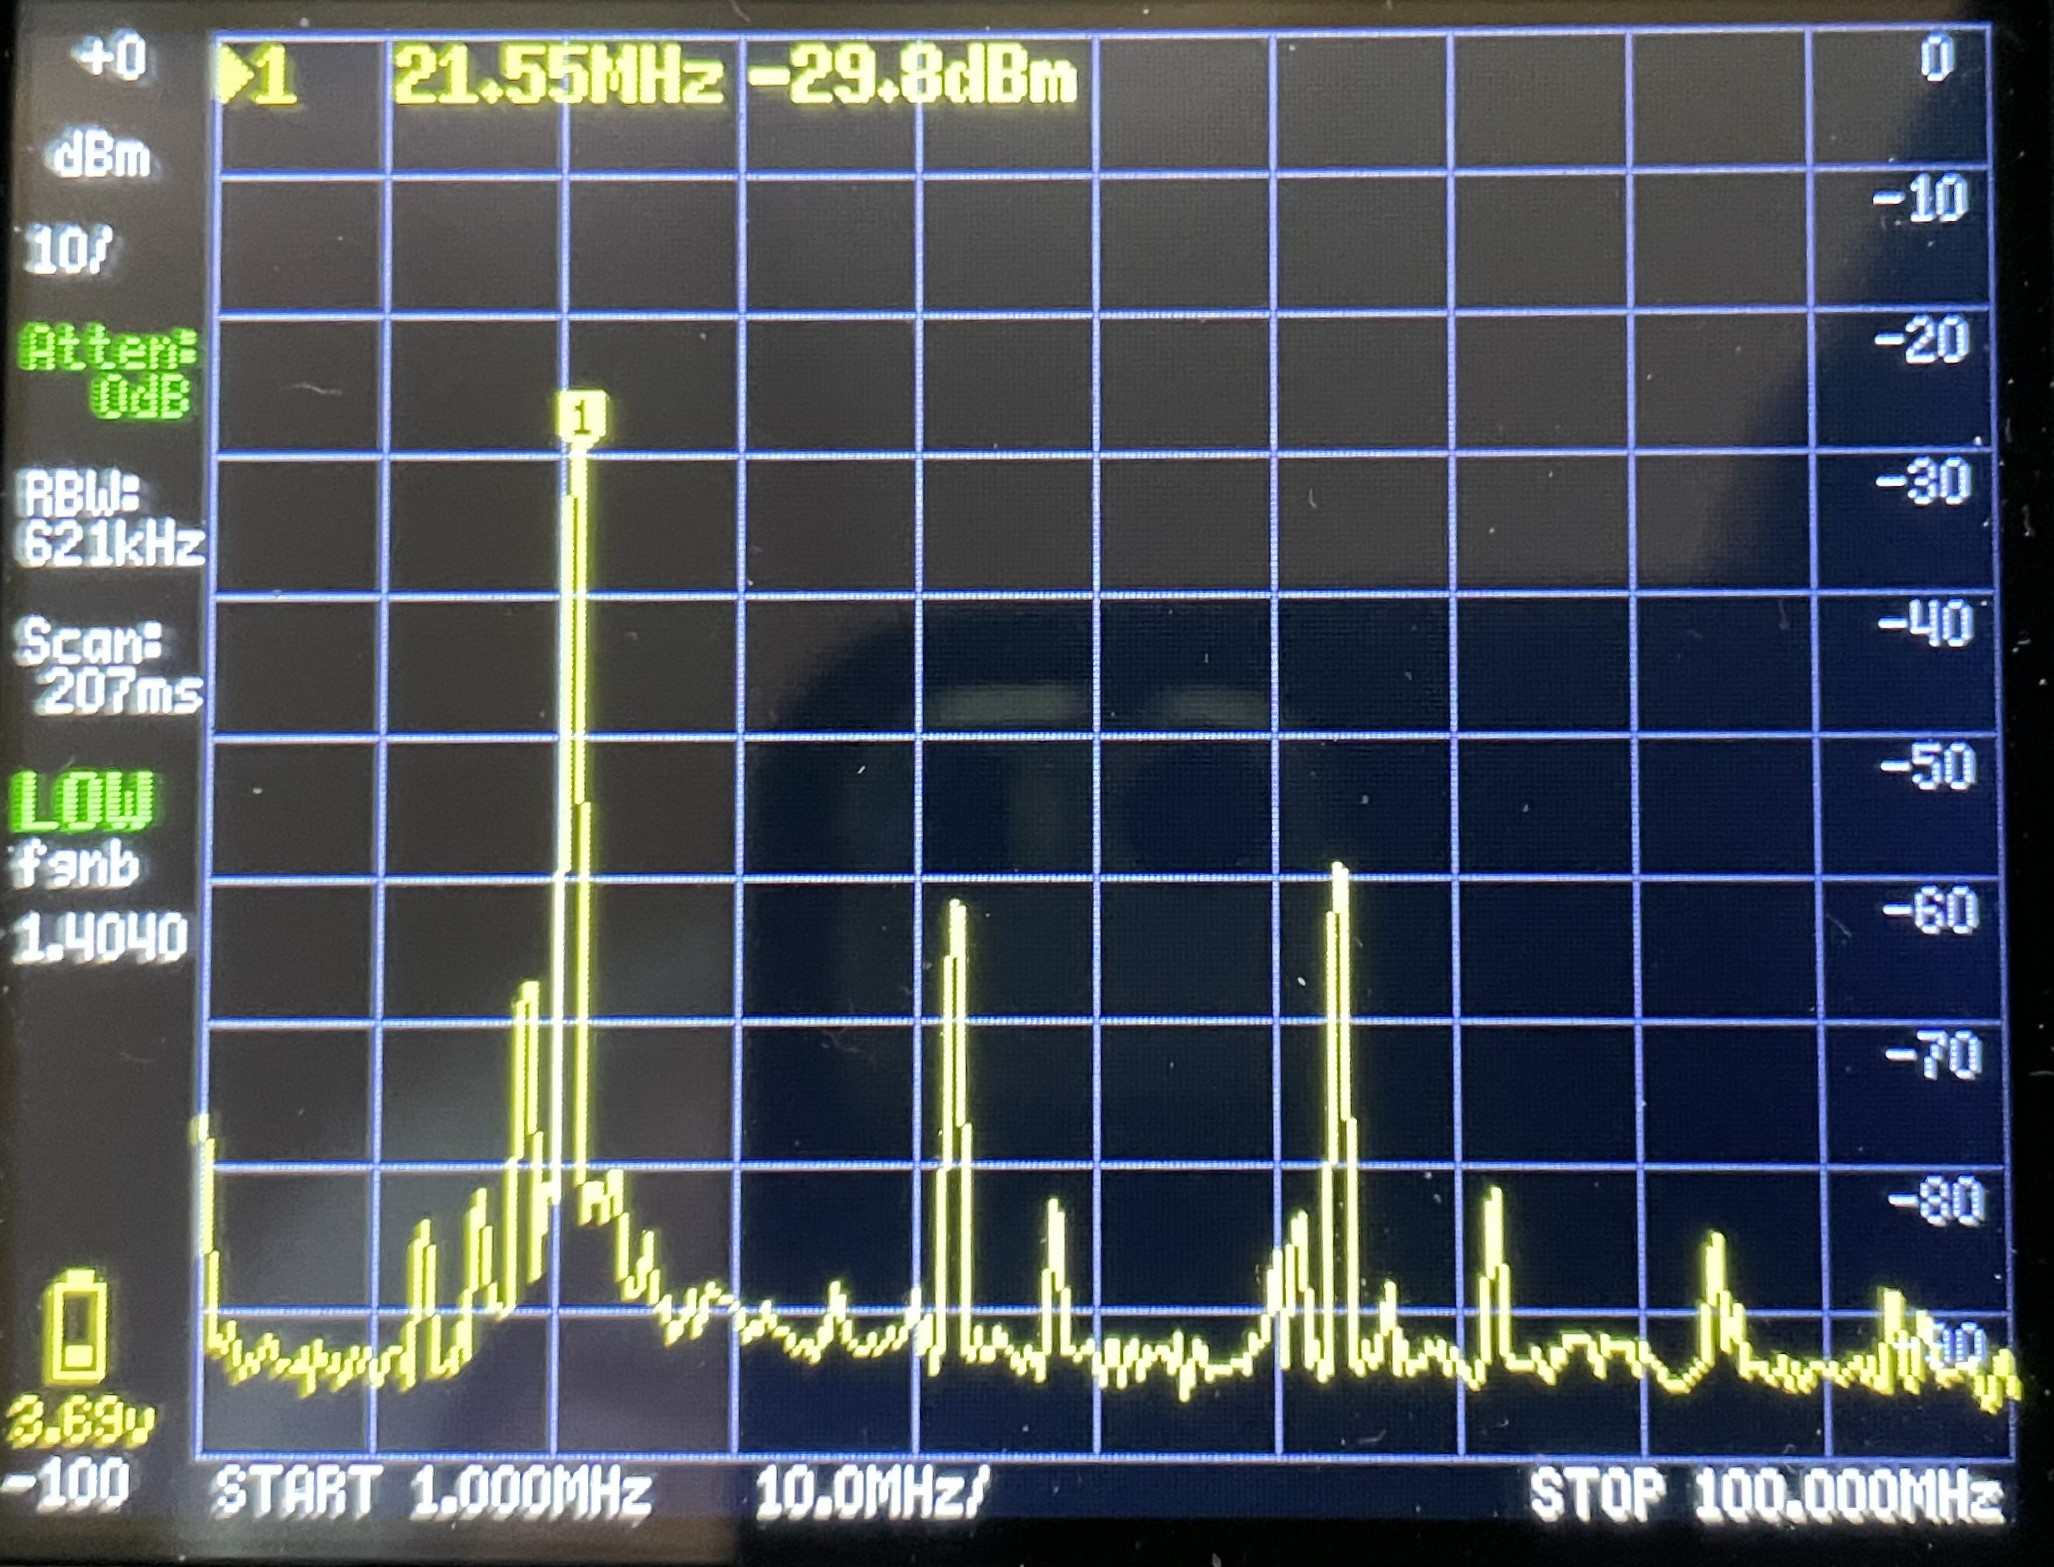
The RF measurements where also somewhat disappointing. The efficiency of the output stage leaves much to be desired for a transceiver intended to be portable. To achieve 3 watts of output, a power of approximately 25 watts is required. Not very practical, and there’s already talk on groups.io/bitx20 about an improved version with a better power amplifier. The harmonic measurement showed mixed results, with suppression sometimes exceeding 30 dB and sometimes exceeding 40 dB. While this was at maximum power, reducing the power didn’t immediately give a much better result. Because it’s a QRP power output, it’s not immediately a problem, but in principle, the transceiver doesn’t meet the requirements.
A few more comments. While the built-in speaker isn’t bad, listening with an external, amplified speaker is much better and significantly improves sound quality. Since this appears to be a proof-of-concept design from HF SIGNALS, and they already ship versions 2 and 3 of the sBitx with much more processing power (RPi4/5), the above mentioned issues could be addressed. The comments on groups.io support this idea.
Conclusion: My expectations were higher than the zBitx’s performance. You shouldn’t compare a $169 transceiver with a radio from a reputable brand that cost much more. The zBitx proves however, that embedded systems must be fully dedicated, and that as soon as multitasking takes place and CPU resources are demanded for other tasks as well, gaps will appear. Furthermore, you can’t build a complete radio in software. Specific circuitry (in hardware) will still be needed to improve performance for CW and Voice Modulation. While monitoring with top the CPU load of the RPi Zero during operation, I see the ‘load average’ exceeding 1 (>100%). It’s struggling. 🙁
The zBitx has a beautiful graphical user interface though. The TFT display is well-designed, and the functionality offered is geared towards amateur radio. This means HF SIGNALS offers the right products.
Note 1: While reading groups.io/BITX20, I found a message from K3JZD. He improved the code, basically by stopping most of the multitasking during CW mode and keying now works flawlessly with both the straight and iambic key. By increasing the delay (under SET) to 500 the breaking up of the macro’s is history as well.
Note 2: In the mean time printed a nice stand. zBtix Stand (w/option for cooling unit) by MikeJoeBob – Thingiverse
Note 3: I’ve found tons of videos about the zBitx on YouTube.
Note 4: If you’re interested in the schematics and don’t want to search for them on GitHub.
Note 5: Standard the BW for LSB/USB starts at 300Hz. I wanted to lower this to 100Hz. You need to change line 2835 in file: sbitx_gtk.c “low = 300;” to “low = 100;” and execute ./build to recompile.